Construction Steps
NORMAL COMPLETION TIME
Four (8) to Six (10) calendar weeks from day of excavation
(weather permitting)
STEP 1 PROJECT DESIGN AND PROPOSAL
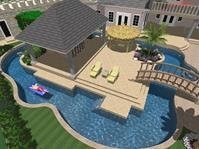
The first step in the construction process is an initial meeting between the client and one of our trained design technicians. During this meeting, our technician will find out what you, as the client, are looking for in the overall pool and landscape layout. All of our pools are designed specifically for each individual customer. The technician will then take a detailed survey of the proposed area to include home and lot dimensions, positioning, building setbacks, location of utilities, and accessibility to the construction site. Within a few days, our design technician will have a fully prepared plan and proposed construction cost for the pool organized for you to review.
STEP 2 PERMITS AND APPROVALS
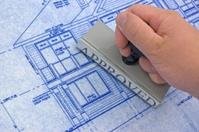
We shall acquire the permit for the construction of the pool and decking. All plans must comply with local and state building codes. We will call 811 in order to locate all existing utility lines before the beginning of construction. We will call for all applicable inspections.
STEP 3 POOL LAYOUT
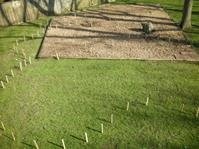
When the plans have been approved by you or your authorized representative and all necessary permits have been obtained, the construction process may begin. Our representative will go over the construction stages with you and help to set the pool elevation. Next, the form boards are set with great care to ensure the pool is in the exact location required.
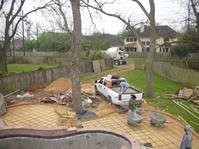
STEP 4 EXCAVATION
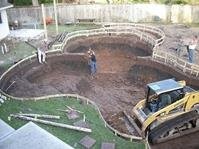
After the forms are set, the excavation of the pool may begin. We generally use small, skid-steer front end loaders in order to precisely trim back the pool walls and to provide added maneuverability within the pool and around the construction site. We will take down any fence panels required and reinstall those at the end of the project. A temporary fence will be put in place during construction.
STEP 5 STRUCTURAL STEEL
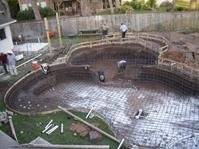
The pool shell is reinforced with steel rebar based on the engineered plans. Either #3 on 8” center or #4 on 10” center will be installed before the gunite is applied. This phase will be inspected by the city.
STEP 6 STUB OUT
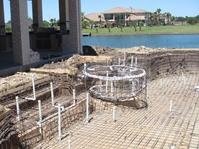
Rough plumbing, or “stub out” is done immediately following steel installation. This entails the installation of main drains, skimmers, light niches, return line “stubs” and pre-plumbing of raised spas.
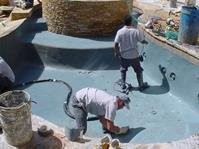
STEP 7 POOL FLOOR AND GUNITE APPLICATION
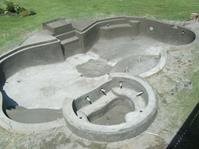
The pool floor and walls consists of concrete and is a minimum thickness of 8 inches. The walls of the pool consist of a mixture of sand and cement (gunite) that is applied through a hose with highly pressurized air. A team of guys will work the gunite to shape the pool walls, floors, benches and steps per plan
STEP 8 TILE AND COPING
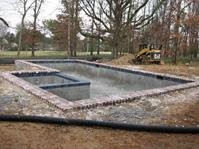
After the completion of the gunite phase, you will be asked to choose a decorative tile for the pool. We have a selection of over 150 different tiles for you to choose from. No matter what colors, textures and materials are being used for the project, we will have something to fit your taste. Stone Coping is what will cap the beam walls of the pool and follow the perimeter of your spa and pool.
STEP 9 PLUMBING
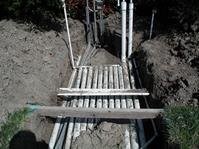
The plumbing for each pool is designed specifically to give it the best circulation and filtration for crystal clear water and ease of maintenance. We perform hydraulic calculations to ensure that all equipment and piping are of the correct size to combine water clarity and energy conservation and to maximize the capacity of the pumps you have chosen.
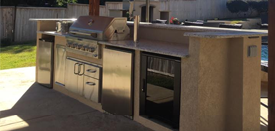
STEP 10 EQUIPMENT SETUP
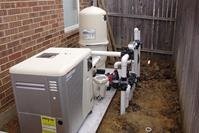
An experienced installer will come to the site and plumb in all of the filtration equipment for the pool, including water feature pumps and other optional equipment from Pentair.
STEP 11 ELECTRICAL AND GAS
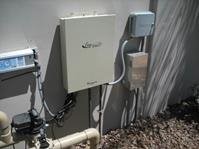
By this point, electrical conduits for pool lights and for pool equipment power should be run. The breaker box at the location of the pool equipment should be installed and ready for the equipment to be set. Gas lines to the pool heater or heaters should also be run to the equipment location. These operations should be handled by a licensed electrician/utility specialist.
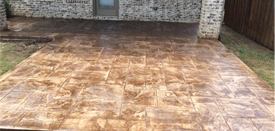
STEP 12 DECK LAYOUT AND POUR
The pool deck should reflect the overall theme for the project, including color, pattern and type. Typically, the deck at the pool edge is shaped using a rounded cantilever foam form for comfort and safety. Pool coping such as brick and stone are also available to compliment the other materials used on the job. The deck is a minimum of four inches thick and reinforced with steel rebar approximately 18” on center. In most cases, any stone or brick work should be completed before the decking is poured.
STEP 13 SITE CLEAN UP
At this point, the project is nearing completion. We will now remove all extraneous construction materials and waste from the construction site and prepare the pool interior to be finished.
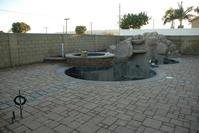
STEP 14 POOL FINISH
The pool interior is coated with your choice of materials, from a standard white finish, or a variation of quartz surfaces , or one of the many pebble finishes that are offered. Different finishes render different effects and moods upon the pool water and therefore the overall appearance of the backyard area. When the coating is finished, we begin filling the pool with water. This should be the final stage of construction. All of the types of pool finishes will be explained to you so you can make the best decision for your family and your budget.
STEP 15 START UP AND INSTRUCTION
Once full, a service technician will come out to your home to check the installation and start all pool and/or spa equipment. Once the equipment has been started up and the pool is fully operational, our service manager will set up a time to come to your home and show you maintenance operations. This includes everything you will need to know about routine maintenance on the pool and some troubleshooting tips. If you do have questions or require technical support, our trained personnel are only a phone call away.
Elite Pools & Outdoor Living
After over a decade of building pools, owner, Jason Cate, decided to follow his passion and began designing them himself. His extensive involvement in the construction of pools has provided him with knowledge that allows him to design the most visually stunning and functional outdoor living areas around.
Read More
Latest From Our Blog
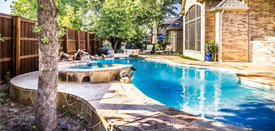
Small Backyard – No Problem
Just because you have a small backyard doesn’t mean that you can’t add a pool, outdoor living space or both. Check out this pool and outdoor living structure we completed in Grapevine recently. The pool has a tanning ledge, jumping rock, a water feature wall with sheer descents, and still plenty of room for the …
How to Have a Successful Memorial Day Party!
Memorial Day is coming up and the weather shouldn’t be to hot to enjoy your outdoor space and entertain. Whether you are just having a few friends over or a big get together these ideas are sure to help you make it successful. Main Dish Build your own hot dog bar, this is something fairly …
Continue reading “How to Have a Successful Memorial Day Party!”
Elite Does So Much More
For Your Perfect Backyard Experience & Entertainment
A distinctive mark, characteristic, or indicating identity. This is the definition of signature.
Learn More